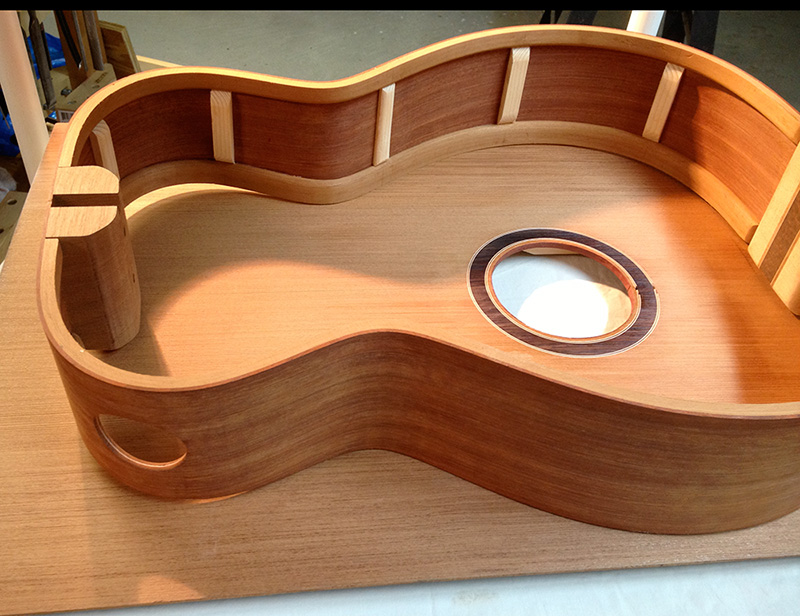
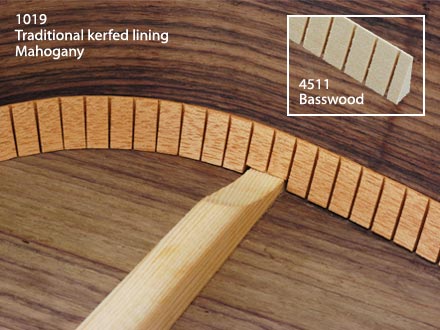
The linings, sometimes called “kerfings” (please don’t), or more properly “kerfed linings,” are strips of wood that provide extra surface for gluing the top and bottom to the rims. Traditionally, in steel-string guitars, the linings are 1/4-inch by 5/8-inch-ish triangular mahogany strips with saw cuts (kerfs) that go almost through the strip. The kerfs help accommodate bending the lining around the curved sides. There are a couple of problems with traditional linings: 1. The linings often break on the more acute curves of the sides during installation; and 2. the kerf spaces often correspond poorly with the braces where they are inlet into the linings, leading to gappy, unsightly spaces around the braces at the linings. The photo below shows the brace perfectly centered on two teeth of the linings. I have to guess this was set up just for this shot.
One solution is to use pre-bent solid linings. There are no kerfs and the linings can be a perfect fit to the braces. A side benefit is that solid linings are said to stiffen the sides, and stiffer sides are said to allow the top and back to vibrate more because less energy is lost to the sides. The down side is making the solid linings, which are basically home-made plywood in the shape of the sides: making an accurate lining mold, acquiring/making enough strips of 0.035″-ish quartersawn stock, and then gluing it all up and having it match the shape of the sides very closely.
A photo of good pre-made kerfed linings. These are from Stewart-MacDonald Guitar Supply. The photo is from their website.
I’m not really to the point in my building career to worry about such small tone enhancements as stiffer linings or hot hide glue –the blog subtitle is “musical carpentry,” not “amazing luthiery” — but I have one set of beautiful flame maple rims glued up with traditional pre-made cedar kerfed linings, and the linings actually crumbled when I cut the bracing inlets. I don’t know what to do about that guitar, but I know I don’t want to ever have that problem again. Solid linings seem like the best solution going forward.
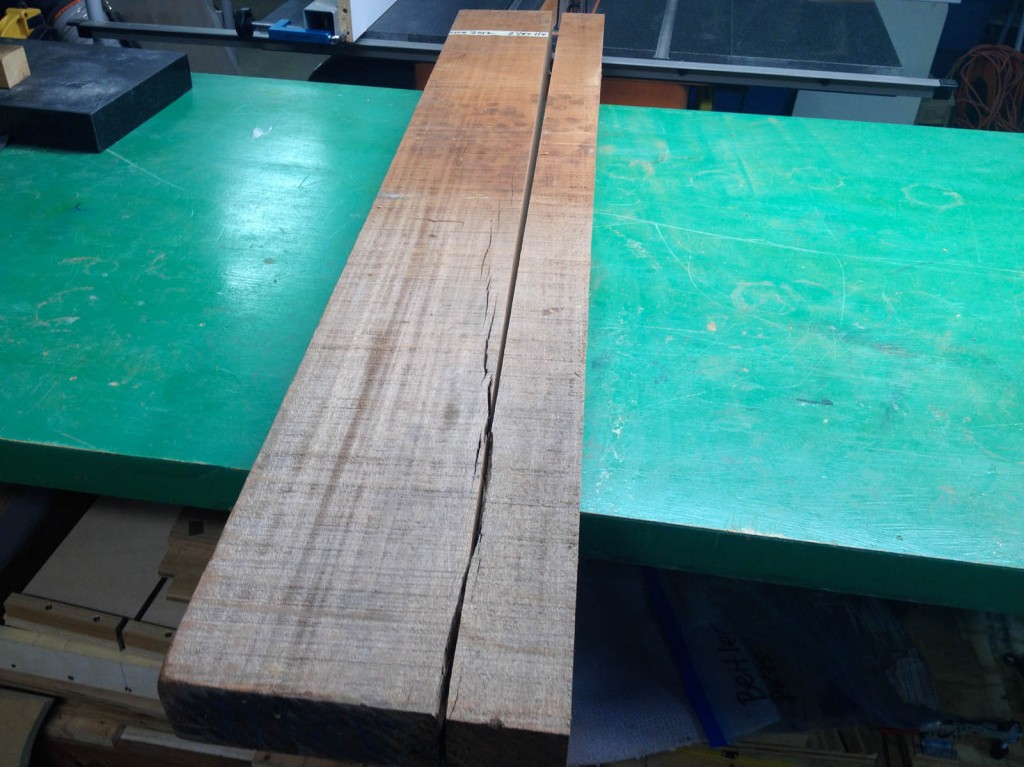
Below is a nice 2-inch thick piece of Honduran Mahogany. It came to me with a split along the grain lines almost all the way through the board. “Showing a few cracks.” It’s quarter sawn and thus a perfect candidate for solid linings. And necks. The photo shows the board after I cut off a 2.5-inch wide strip.
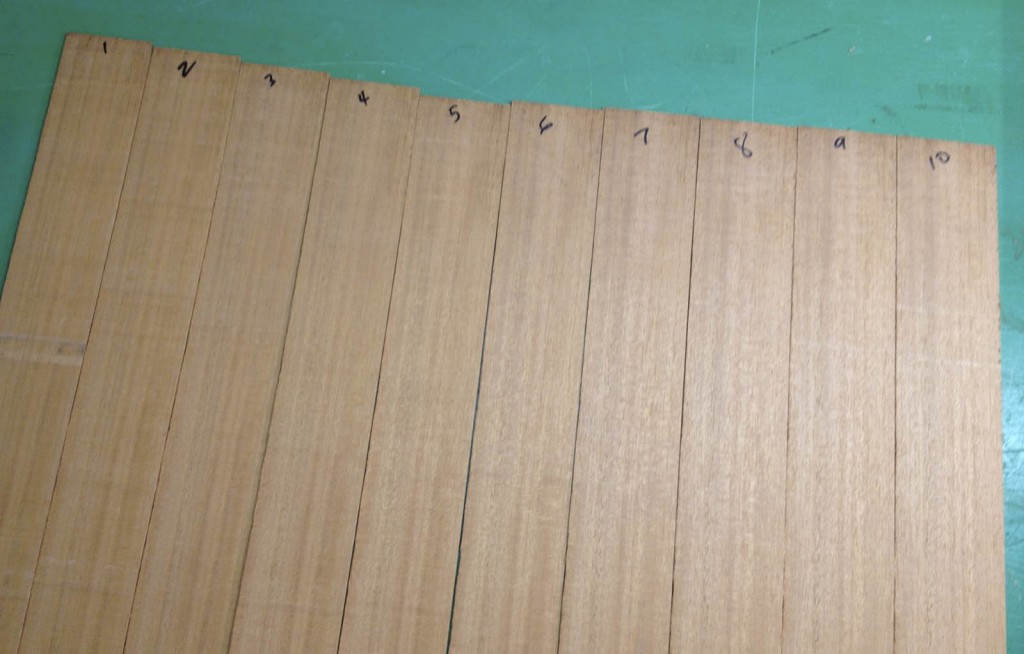
This photo shows the ten slats that I bandsawed out of the 2.5″ strip of quartered mahogany. They are a little more than 1/16″ thick. They are numbered so that they can be glued back together in the same order in which they were sliced off the board, which I ended up not doing, because I couldn’t think of a reason to do it that way. Anyway, the slats are run through the drum sander in very light passes until they are 0.035″ thick and ready to be laminated and shaped in the linings mold.
The linings mold is shown below. I made it by tracing the inside of one of the sides while it was in the main building mold. I then used a plastic washer and a pencil to draw another line uniformly offset from the first traced line. The offset is 0.27. These two lines were traced onto two pieces of 3/4″ MDF to make the lining mold parts. Then I duplicated both of the pieces of MDF to double the thickness of the molds and glued and screwed them together. The lining thickness is the same as the mold offset — 0.27 inch, and the height of the lining that can be bent in the mold is 1.5 inches. The next time I make a lining mold it will be thinner than .27 inch — something closer to .20″ to save on weight.
You’ll notice below that I only need one set of clamping holes in the mold. My mistake. I used John Bogdanovich’s mold style but didn’t study the photo carefully enough, and now I have a mold with too many holes, although it’s probably lighter than Bogdanovich’s mold as a result. Oh well. It seems strong enough to work as is, especially after adding a few screws to the weaker areas.
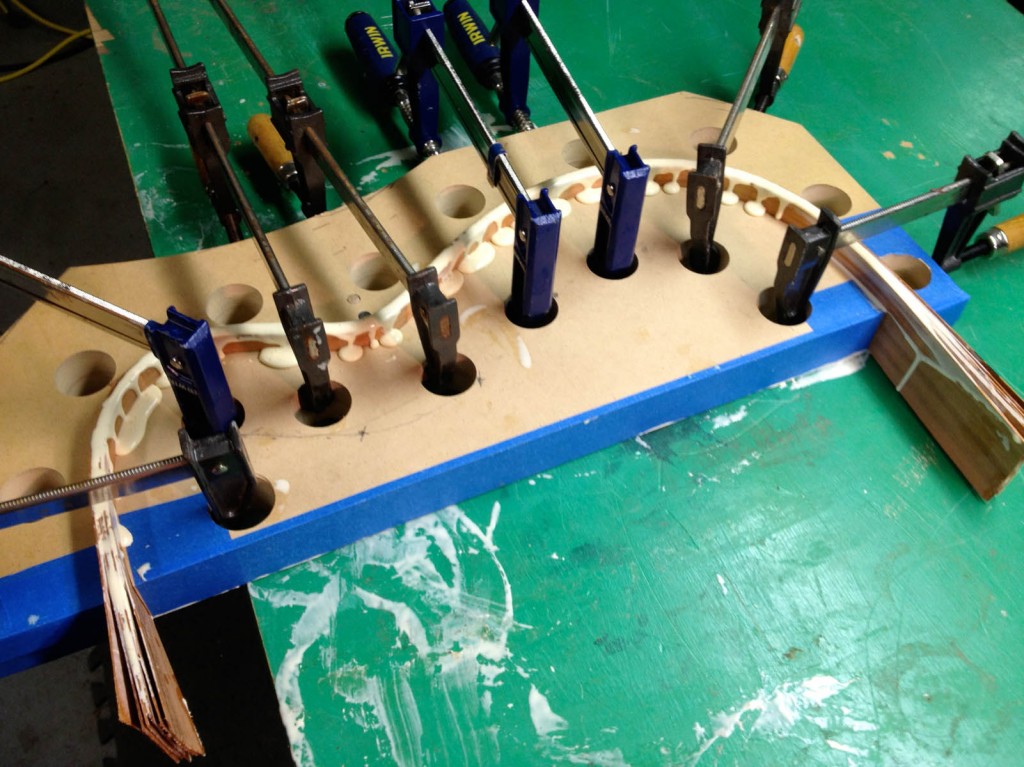
The photo below shows the slats glued up in the lining mold. Next time I’ll use a lot less glue. I used Titebond Original glue on this piece. It’s much cheaper than LMI glue and this is not a stressed joint.
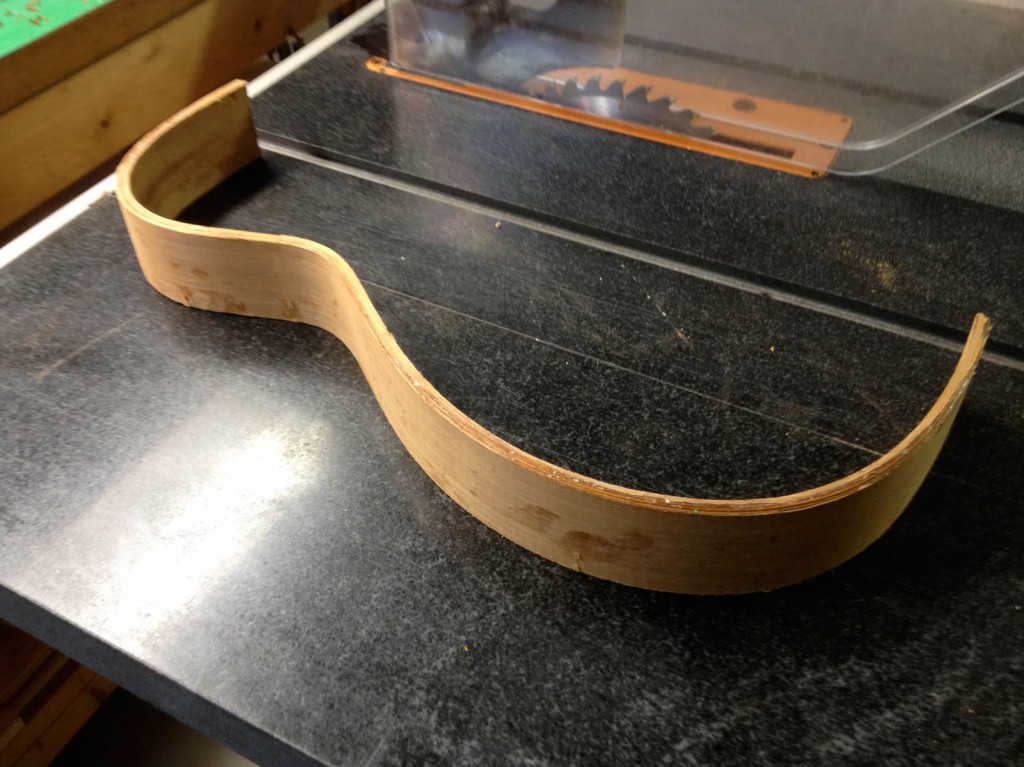
This is the lining after removing it from the mold. It is 1.5 inches tall after planing off the part of the lining that stuck up out of the mold. This will be halved on the bandsaw into two pieces that are a little less than 3/4 inch wide.
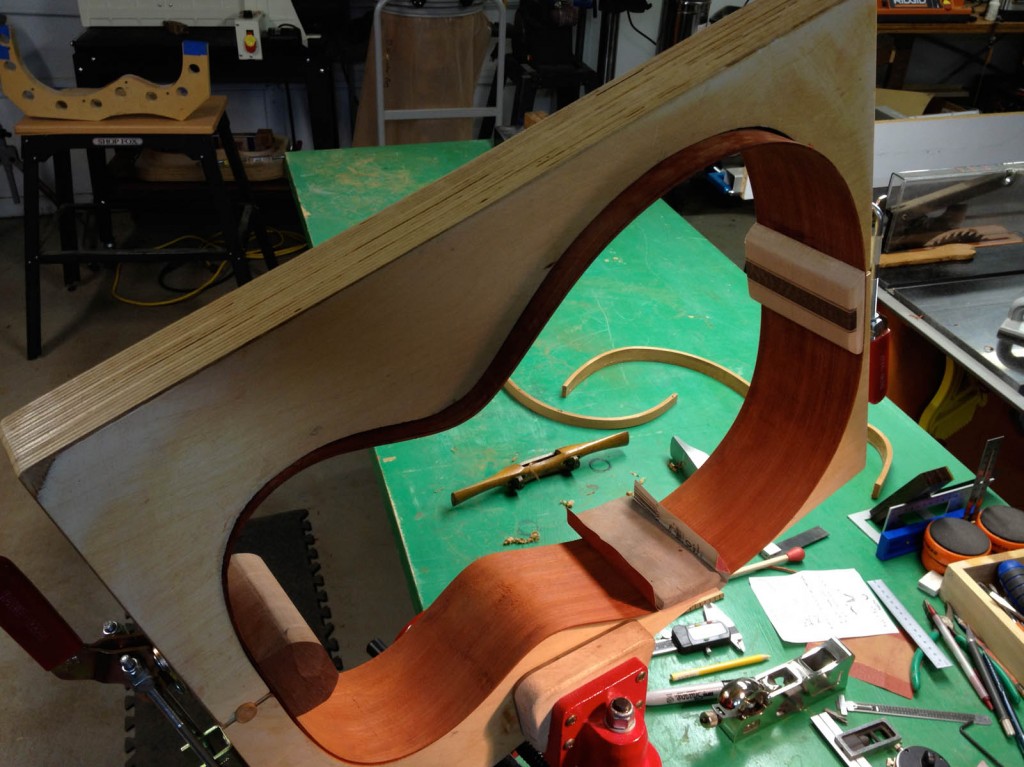
Before the lining can be glued to the rims, the rims need to be cleaned up. There are still a few water stains and heat stains to be sanded out. Also, all glue joints are always always always prepared so that you are gluing freshly sanded and cleaned (or planed) surfaces together.
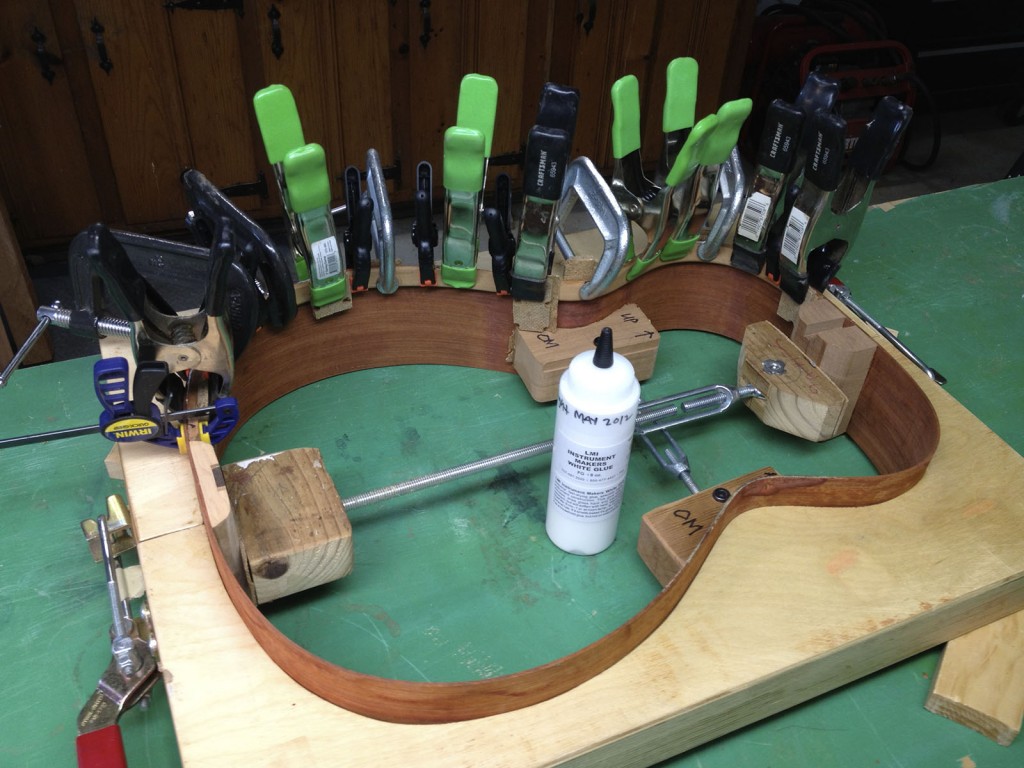
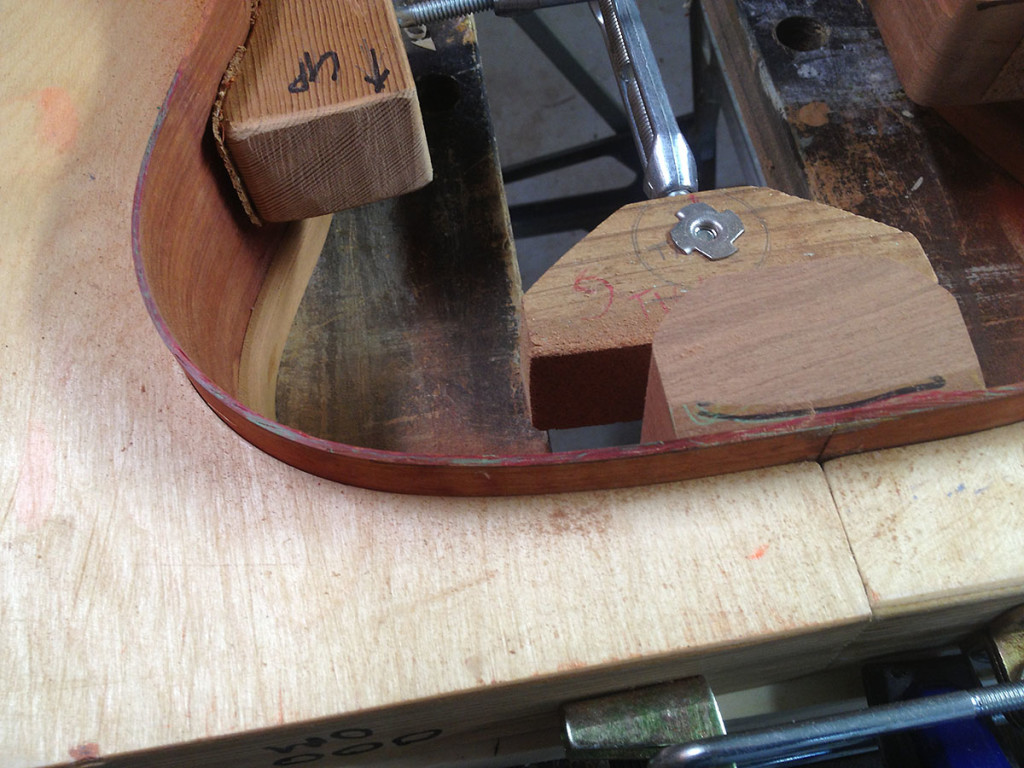
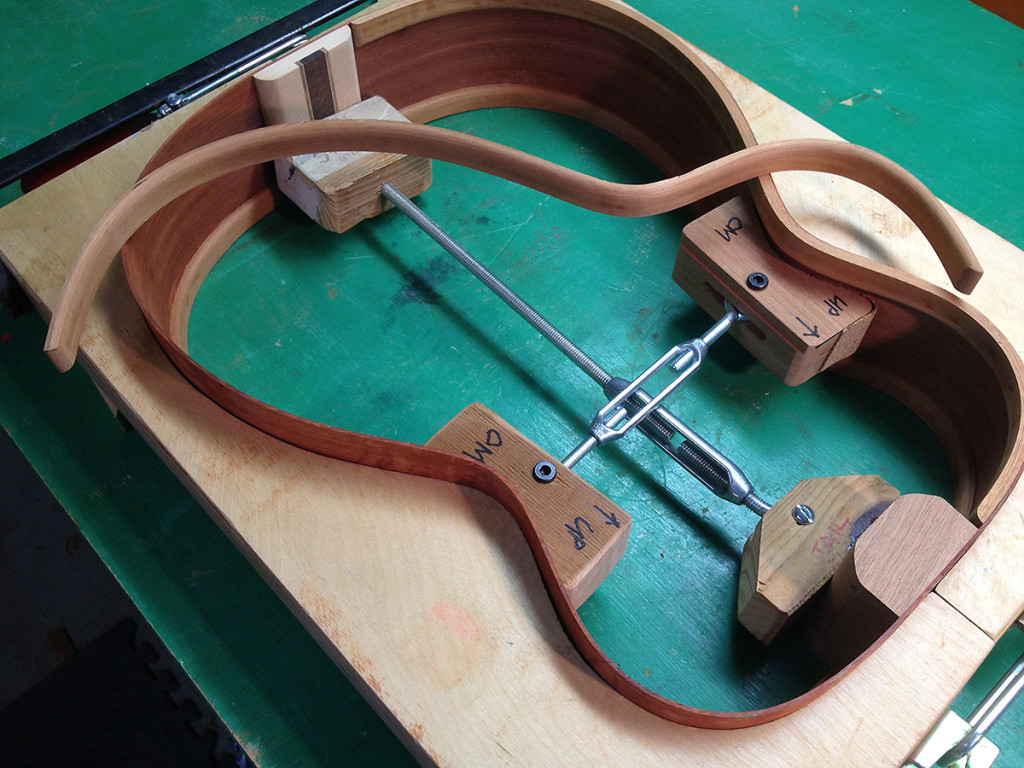
This photo shows the first side of the linings being glued up. The solid linings take a lot more force to glue than kerfed linings. I was worried about not having a seamless fit all along the joint, but it turned out pretty good for a first-time effort. Next time I do this I will have a bending iron on hand to make the linings a better fit to the sides. I think there is too much tension in this glue-up. There is probably a carpenter’s rule about how little force should be required for a good joint, and I’m sure this joint violates it. One of the upsides of gifting your home-made guitars is that you don’t have to give anyone a lifetime warranty. This is a big deal. For instance, I was into my fourth guitar before I heard that it is probably bad for white and yellow glues to freeze. I’d hate to have come across that fact after building 50 warranted guitars.
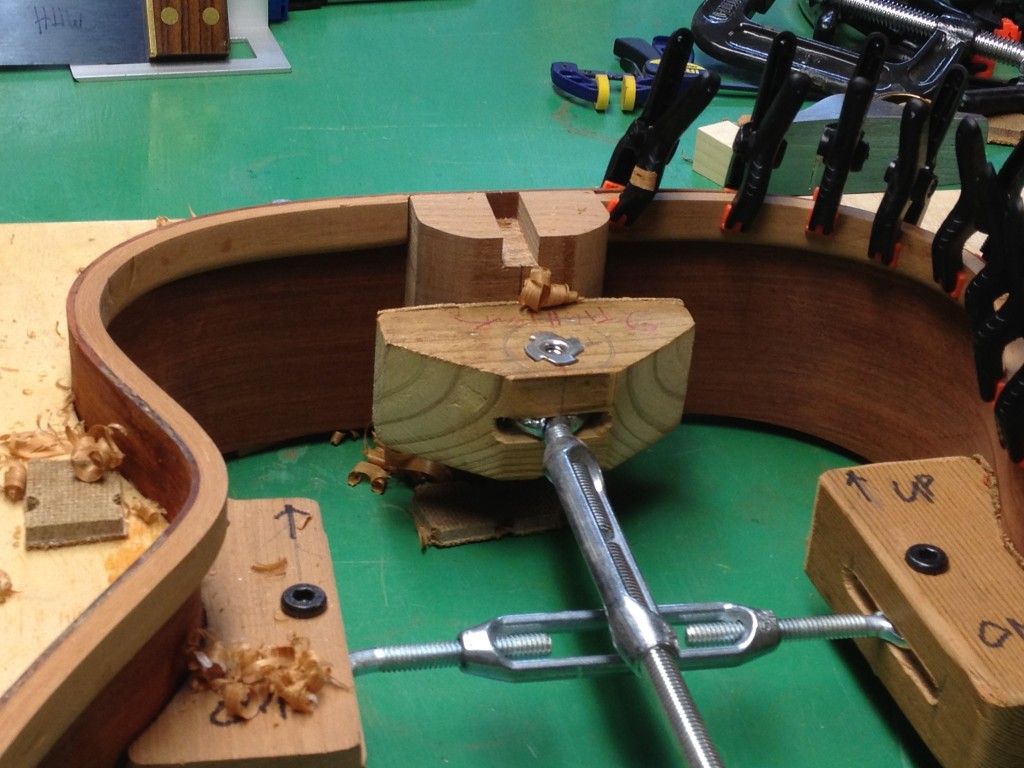
Notice that the rims are in the mold and the stretchers are in place as the linings are glued in. I once glued up a set of pre-made linings in a guitar that wasn’t in the mold. As soon as I had the clamps off, I put it back in the mold and all the linings made an awful cracking sound as I threw the handle that tightens up the two halves of the mold. Instant firewood. I ended up making a groovy shelf from half of that rim set. (Another good idea from my wife, Karen.) Think before you glue.
Cleaning up the lining with a plane so that it is just a hair above the edge of the rims.
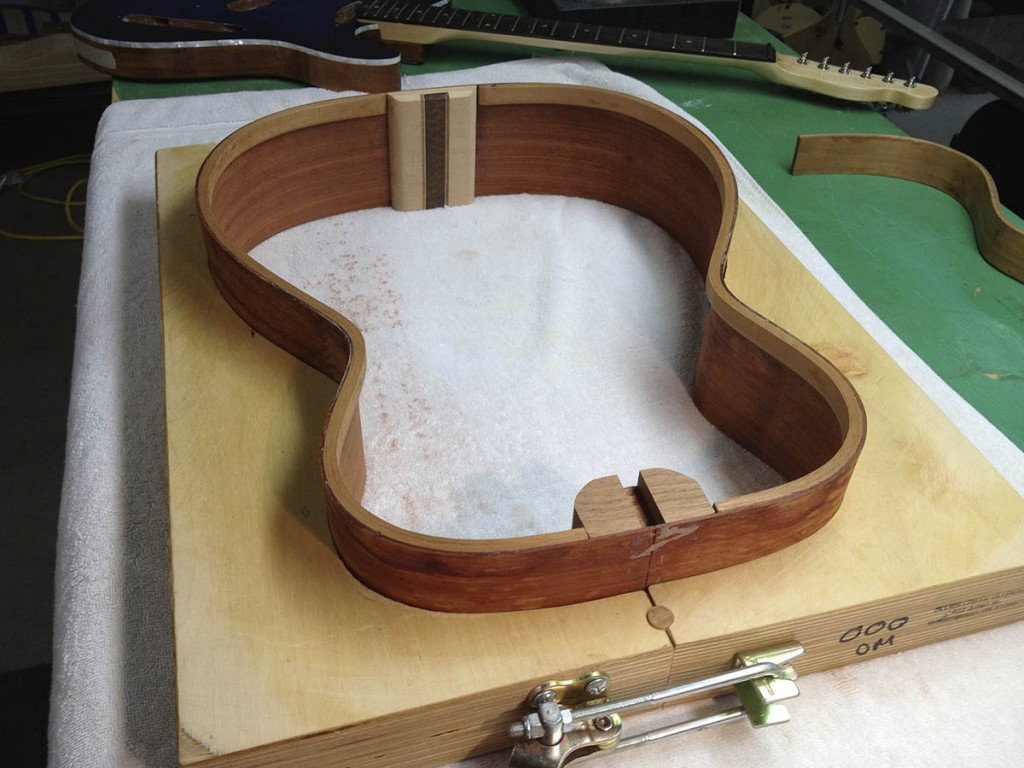
Then we do it all over again on the opposite side and we have the top side of the guitar ready as shown above. Unfortunately I broke my bandsaw’s lower wheel axle after gluing this and will have to wait until it is fixed to make the linings for the back side.
Four months and more than a few cold fronts pass…
Okay, it only took a few months to get the broken shaft out of my bandsaw, but that’s finally taken care of and we can get back to making this guitar. The time off coincided nicely with the weather — my little shop is not adequately heated. So on March 19, I got back to making the linings for the back of the guitar. This went pretty much exactly like the first set of linings, but with less glue.
Sanding the rims to final height.
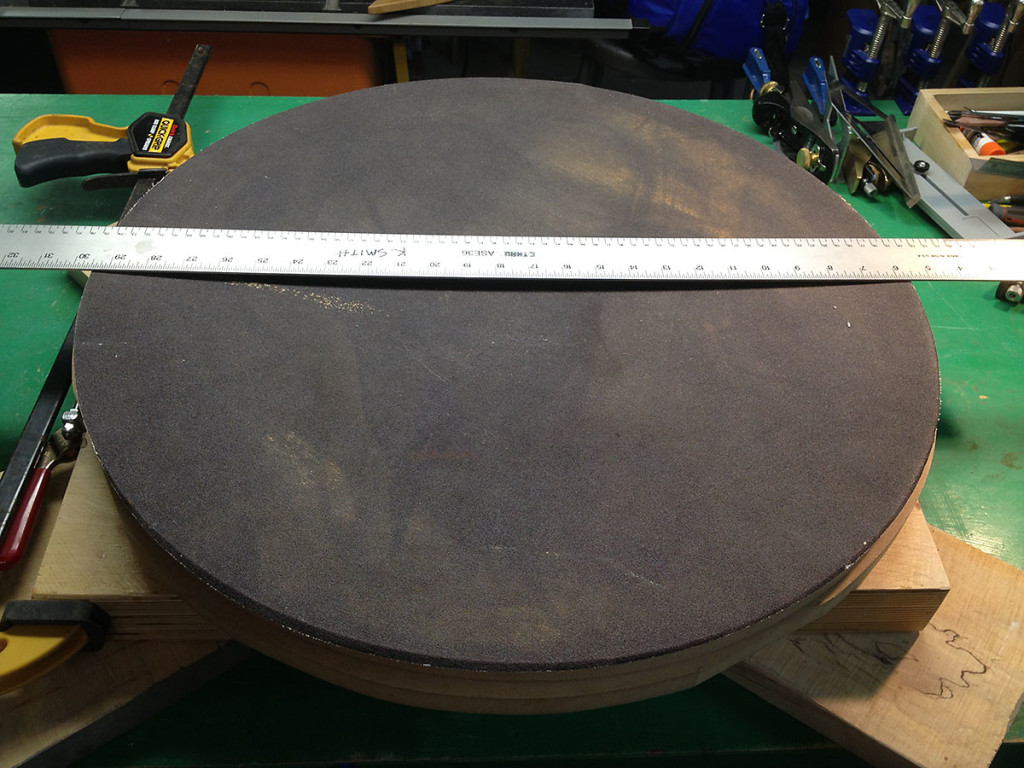
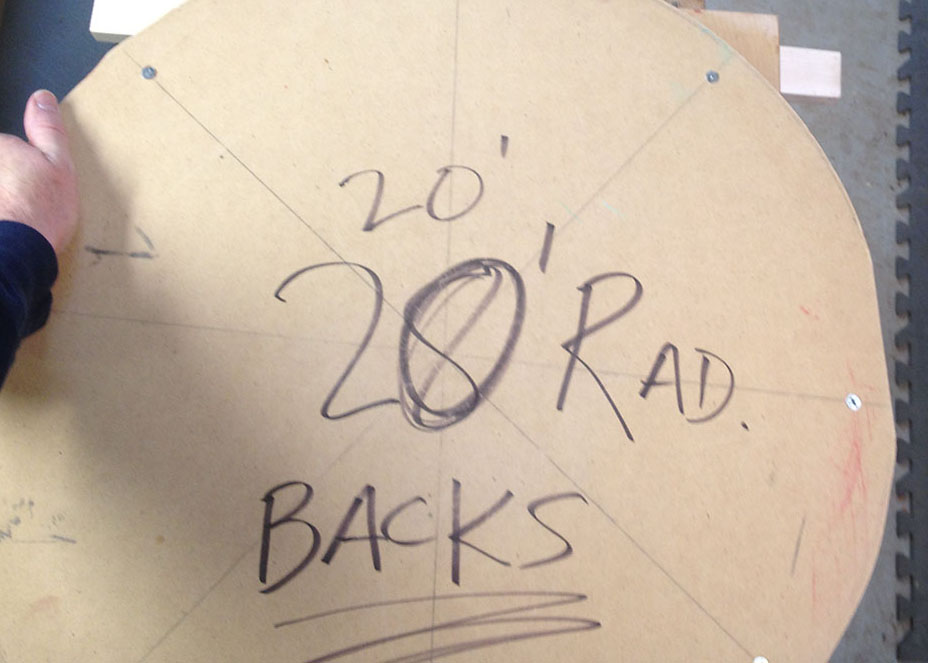
Before gluing in the linings for the back, we’ll need to get the shape of the back prepared. The top and back of most acoustic guitars are not flat, though they are commonly called “flat-top guitars.” Most guitars have a gentle curve to the top and back to help the guitar adjust to changes in humidity, as well as a cosmetic function — keeping the top from looking sunken in. My guitars are made with a domed top and back. The top has a 28-foot radius and the back has a 20-foot radius. The doming is made using an MDF board that has a radius carved (routed) out and a piece of sandpaper applied. Here’s a photo of the one I use for backs. An important concept to understand about the dome-radiused forms is that every part of their surfaces is the same. There is no “long” side. Think of these radiused forms as a circle cut out of the inside of a basketball — there’s no part that is flatter than the center. My radius dishes were made by the very helpful John Hall at Blues Creek Guitars.
Here’s a link to a PDF I made that has 24-inch-long curves drawn in 15-ft, 20-ft, 28-ft, and 30-ft radii. Print this out only at ACTUAL SIZE or you will not get the correct curves. You can use these to make bracing templates and guides. R.M. Mottola has a good section on domes here: http://liutaiomottola.com/construction/CMap.htm.
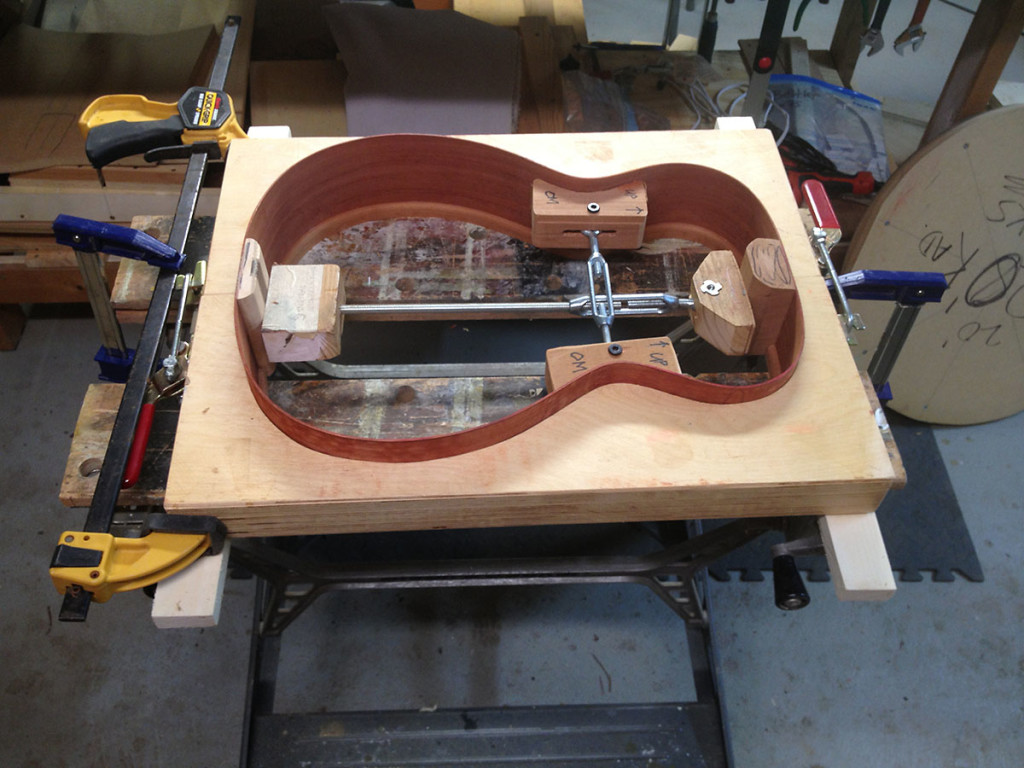
After making sure that the treble and bass sides of the guitar are matching in height, I clamp the rims to my trusty Black and Decker Workmate and begin sanding with the radius dish. You will remember that most of the shaping was done using a piece of white posterboard cut to the shape of an OM side from a plan drawing, so there is not a lot of wood to remove. I could wait until I have the linings glued in to do this, but it’s a lot easier sanding the thinner sides before they have another 1/4 inch of lining attached. But by sanding the neck and tail blocks down at this point, you don’t have the option of using tall linings to eke out a box that’s slightly deeper than the sides — you’re limited by the height of the neck and tail blocks.
This is the back of the dish. The business side is covered with sandpaper, and as I rotate the dish, the sandpaper is cutting a dome into the rims. I mark the sides with colored pencils so that I will know when all of the surfaces have been sanded. When the marks are all gone, the sides have a 20-foot radius dome. You may notice that I wrote BACKS in large letters on the form. I don’t want to put a 20-foot radius on the top, just the back. Here’s a photo of the red, green and black markings after a few minutes of sanding:
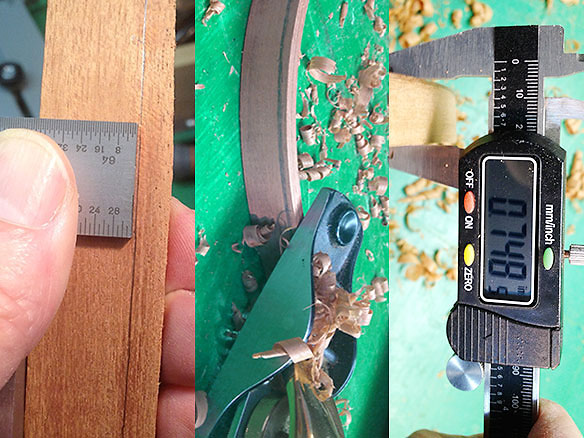
After 15 minutes of strenuous sanding, all the marks are gone, and it’s time to prepare the linings. First, one edge of the linings is rounded over with a freshly sharpened scraper and finished off with sandpaper. Then, as shown in the photo below, the linings are marked and planed to 3/4-inch high.
After the prep, they are glued to the sides and then planed down to about 1/32nd inch above the sides. Here’s the final lining waiting to be glued:
After the rims are complete, we’ll use the radius dishes again to prepare the rims for gluing to the top and bottoms. But first we must add side supports and cut a soundport out of the side that faces the (right-handed) player.
Side supports.
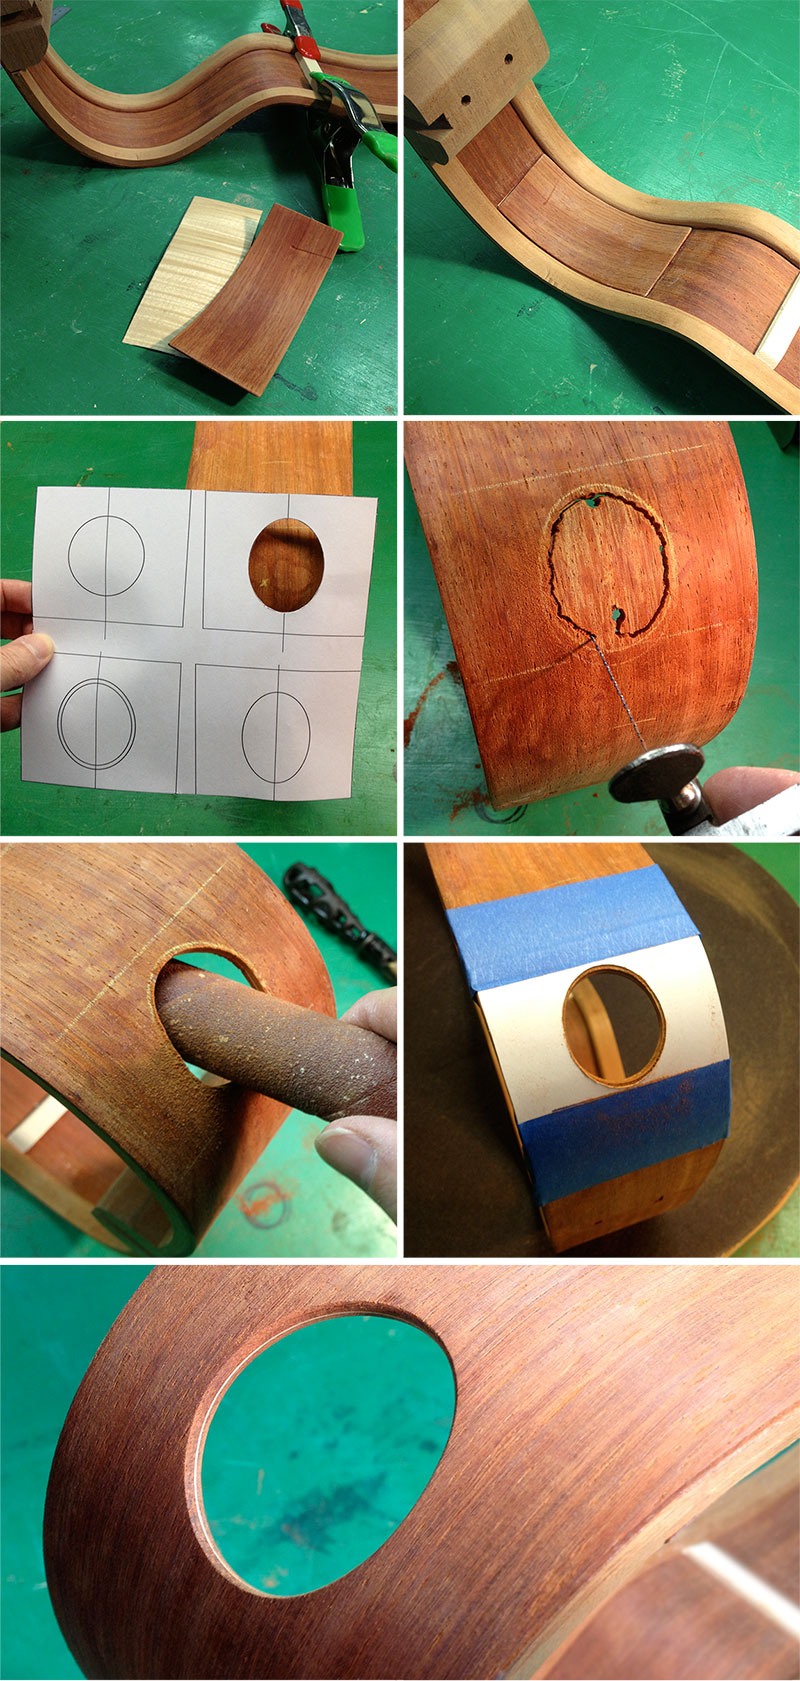
Side supports/reinforcements are not really structural. So I hear. They are there to help stop cracks in the sides that run with the grain lines. Fabric strips (linen, muslin, silk) have been used by traditional guitar factories, and many luthiers use thin pieces of wood. This guitar will use pieces of Adirondack spruce that were prepared like braces. If you are putting in a soundport, make sure you don’t put a support in this area. Here’s a photo of the creation sequence:
For the record, I compared these rims to another guitar I have that is at this stage of completion and this is a much stiffer structure. Some people say that the difference is nominal after the top and back are glued on, but right now the comparo tells me that this is coming along very nicely. It is, after all, a lot more work to have solid linings. A lot more stuff for you to read*, too, so thanks for staying with me. Also, these weigh a lot more than the traditional rims. That may or may not have an effect on the tone, but no one will pick up this particular guitar and tell you how light a home-made guitar is compared to a factory guitar.
The soundport.
A soundport is simply a hole of any shape cut into the sides. When properly placed, the player gets an enhanced image of the guitar’s sound. I think soundports also aid in string separation, that is, hearing each note in a strummed chord more clearly, rather than a jumble of in-tune frequencies. I hear a more open, immediate, cleaner sound. And, as my friend John Fleury says, everybody needs an onboard cup holder built into their guitar. So I’ll probably never build another guitar without one. Here are the steps:
Top row of photos below: The inside of the rim needs reinforcement in the area around the soundport, so I used the bent padauk sides that I ruined on an earlier version of this guitar as a donor and cut out a piece that fit the space between the linings. (Don’t burn your mistakes.) I also cut out a piece of flamed maple veneer to use inside the sandwich — it will show up as a simple white line inside the cutout, a bit of cake decorating. Those are glued in the next photo.
Second row: Based on other guitars I’ve built that have soundports, I’ve made a template in Adobe Illustrator showing a number of similar sizes. I settled on an oval that is 2 inches high and 1.6 inches wide. The template was cut out and taped to the sides and the hole was marked. Two holes were drilled to allow access to a coping saw. I used a spiral blade in the coping saw. It wobbled a good bit, so I stayed away from the edge.
This and other operations on the sides are made much easier by the rigidity of the solid linings. At no point do you feel like the structure is flexing or in danger of being pushed too hard.
Third row of photo above: I cleaned up the hole with a one of the spindles from my sander. As I got close to the edge, I put the template back on.
Bottom photo: finished soundport.
Flattening the upper bout on the soundboard side of the rims.
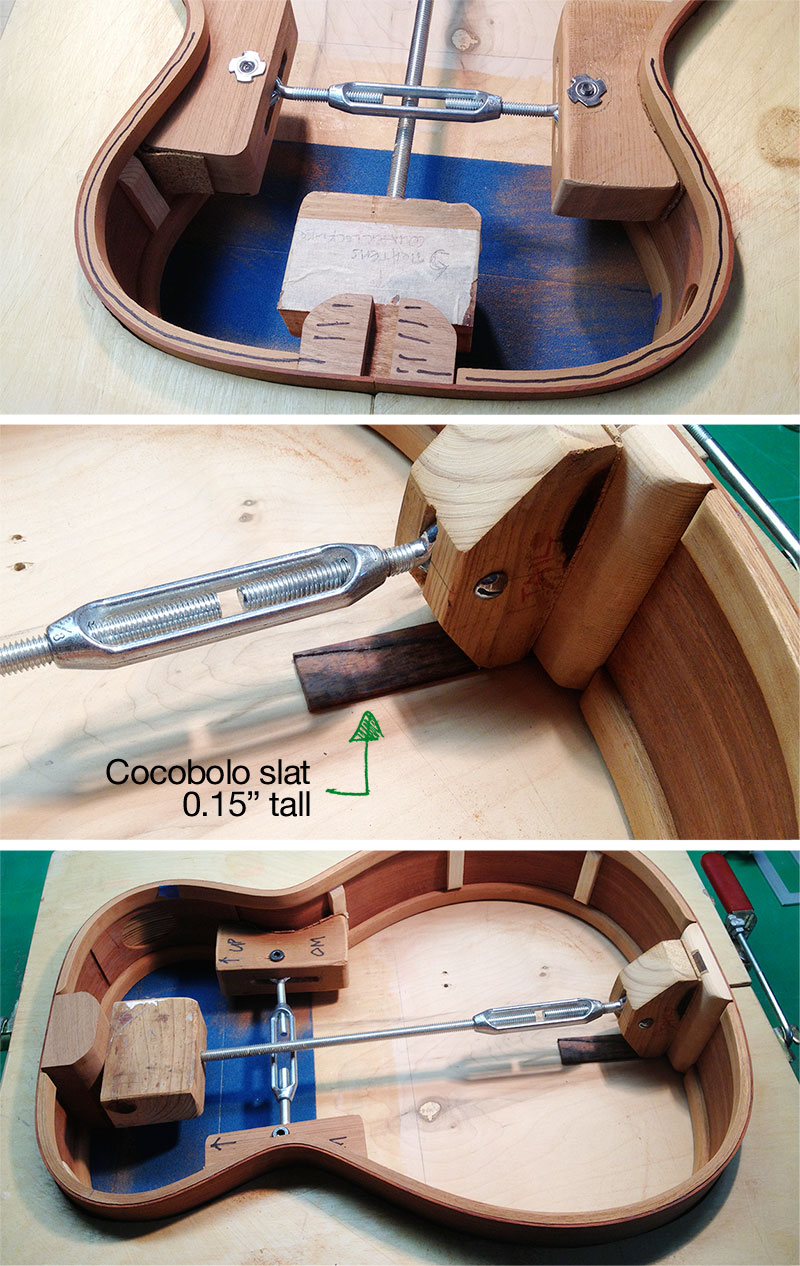
One last thing remains to get the rims finished, flattening the area of the top where the fretboard lies. If you wish to be reminded that your guitar is built to a domed top and back shape, lay a straight, flat piece of wood like a fretboard across it. You’ll see a gap. You don’t want any gaps on your guitar. The way I avoid that gap between the top and the fretboard is to flatten the top in the area above the waist. I use a method that I learned from Hesh Breakstone of Ann Arbor Guitars in Michigan. He has lots of great tips on his old website. (Go to the “Luthier Info” section.)
To flatten the rims, I glued sheets of 80 grit sandpaper to a flat piece of plywood. Then I did as you see in the photo below: First, I marked the area to be flattened. Then I placed a piece of cocobolo rosewood that is 0.15-inch wide beneath the tailblock and started rubbing the upper bout on the sandpaper. The angle created by the piece of wood under the tailblock puts the rims at the same angle as the neck. When the marks on the rims are sanded away, you have a flat rim above the waist. Simple and it works great. Thanks Hesh!
*Instructions for using kerfed linings: “Buy some kerfed linings from Stew-Mac. Place linings on the rims to measure the length. Cut them to length. Sand and clean the mating surfaces. Glue and clamp with 1/32nd inch of lining left proud of the edge of the rims.” As you see, kerfs take a little wood and a whole lot of air out of the build.

